Easy and Elegant Crème Wafers

Learn the Cookie Craft with a Great Book

You can hardly find an easier cookie to mix than these Easy and Elegant Crème Wafer Sandwich Cookies. With only three or four ingredients for the cookie and only three or four ingredients for the filling, they may be the simplest cookies you will ever mix.
The process of rolling out the dough, cutting out the wafers, and all that follows, however, does require quite a bit more attention and focus than the mixing does, especially if you are new to the process of making rollout cookies. But just follow these helpful, easy tips, and you will end up with a delicious and delightful treat to include along with other edibles as a gift or to serve with afternoon tea and coffee.
Wafer Recipe
1 c. softened butter
1/3 c. heavy cream (whipping cream)
2 c. all-purpose flour
Granulated sugar [instructions further below]
- Mix together thoroughly the butter, cream and flour.
- Divide into several smallish batches (each ½-¾ cup of dough) and chill.
- Heat oven to 375°.
- Roll out one small batch of dough at a time between two pieces of wax paper to 1/8" thick.
- Using a cookie cutter or biscuit cutter, cut into 1-½ to 2" circles.
As you see, the wafer portion actually resembles a pastry recipe and will, unless over-mixed, create a flaky and gently crisp bite. Butter makes the flavor delicious. Although I have substituted margarine or shortening for butter in other cookie and pastry recipes, I have never tried either one with this cookie, and so I can’t predict what the results might be.
The Standard

What about Sugar?
No sugar in a cookie dough - what’s the world coming to? The sugar is actually on the outside of the wafer! After the dough has been rolled out and cut into circles, the wafers are to be dipped in granulated sugar and then placed on a cookie sheet for baking. Follow these steps:
- Transfer rounds to a piece of wax paper or small plate sprinkled liberally with sugar.
- Coat each round with sugar on both sides.
- Place on an ungreased baking sheet.
- Prick rounds with a fork four times to create a 4 x 4 dot pattern.
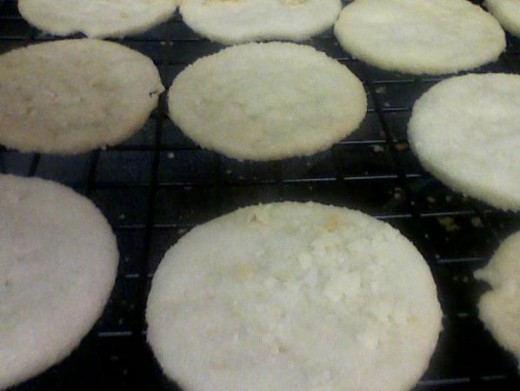
- Bake 7-9 minutes (they should not get dark).
- Remove to wire racks to cool.
Cream Filling Recipe
Add together the leftover scraps of dough from each batch and re-roll until all dough has been cut. When all of the wafer dough has been rolled out, cut into rounds, pricked and put in the oven, start making the cream filling.
¼ c. softened butter
¾ c. confectioner’s sugar
1 tsp. vanilla extract
Few drops of food coloring, optional
-
Mix together the ingredients, adding food coloring last and carefully (even just one drop at a time, until you reach the color you like).
-
Optionally add 1-3 drops of flavoring, such as peppermint. Mix well.
- When the wafers are cool, put together two rounds at a time with the filling.

Memorize the Recipe
If you like to keep your favorite recipes in your memory, try this memory tip: For the wafer recipe, use one cup of butter, two cups of flour, and one-third cup of cream. (1-2-3) Sugar on the outside – not measured.
For the filling recipe, use one-fourth cup of butter, "two-halves" teaspoon vanilla extract, and three-fourths cup confectioner's sugar. (1-2-3) Drops of food coloring and/or added flavoring – add one drop at a time, until you are satisfied with the result.
More Great Cookie Recipes

The Secret of Success
The trick to success in rolling out and cutting out the wafer dough is to find the right temperature for the dough at each stage. For mixing, the butter needs to be soft enough to mix, but not runny. After the dough has been chilled for rollout, it should be cold enough, but not too cold. Too cold a temperature will make it hard to roll out and difficult to roll to the right thickness. But then, if it is chilled after being rolled out, being too cold will make the dough brittle and prone to breaking when being removed from the wax paper. Too warm a dough will stick to the wax paper, not cut into rounds properly, or lose its shape when being transferred to the sugar or from the sugar to the cookie sheet.
I find that it helps to allow the chilled dough from the refrigerator to soften just slightly before it is rolled out. Then I like to return it to the refrigerator for a few minutes or even to the freezer compartment (for even less time) before it is cut into rounds. It’s important to remember that the kitchen will become warmer during the mixing-rolling-cutting-baking process, because of the oven’s heat. As a result, the time required for chilling the dough will become longer, and the time required for softening it slightly for rollout will become shorter through the process of making and baking the wafers.
Cookies Everywhere
I usually have batches of the dough in several locations at the same time: some in the main compartment of the refrigerator, keeping cool; some on the counter, softening slightly or in the process of being rolled out; some rolled-out batches in the freezer, chilling again for easier cutout; some rolled-out, cut-out wafers in the plate of sugar or on the cookie sheet; and some in the oven or on wire racks.
Once they are finished, their best location is in my mouth - or tummy! - unless I am feeling generous enough to share them. LOL!

")

")